ShopMate EPoS
Managing and editing a product
Step: 1

If a product does not scan, a message will display on screen, giving you the option to add the product immediately, or ignore it. If you want to add it immediately, press Add Product. If you want to add it later use an appropriate hotkey such as ‘Misc VAT’ or ‘Misc non-VAT’ to complete the transaction. When you are ready to add the product, press Manage Products.
Step: 2

A Product Management screen will display in the main till interface area prompting you to add a barcode by scanning or pressing the barcode box and typing in a barcode, then press Submit. If the product is not recognised by ShopMate, you will be asked if you would like to add the product. If you press Yes you can add a description, VAT information and selling price.
Step: 4

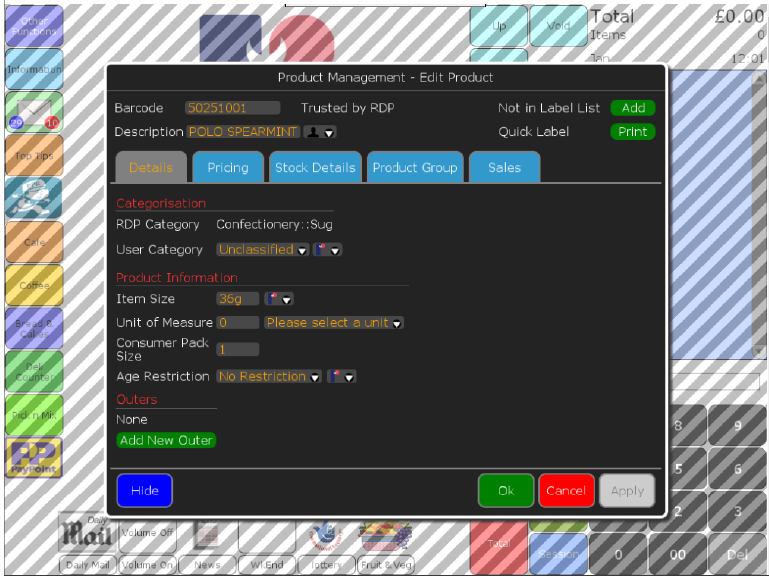
When you have scanned a product into Product Management you will see information at the top about the barcode that you scanned or inputted via the onscreen keyboard and the description of the product. On the right of these you will notice two buttons ‘Add’ and ‘Print’. Pressing Add for ‘Not in Label List’ will add a label to the shelf edge label list to be printed off on your laser printer. By pressing Print for ‘Quick Label’, you can print a temporary label instantly on the receipt printer.
Need more help?
Contact our Technical Support team.
Contact our Technical Support team.
 |
95% of issues resolved on the phone |
 |
Speak to ShopMate experts every time |
 |
UK-Based Customer & Technical Support |
 |
365-day support as standard |
 01780 480 562