ShopMate EPoS

Promotions

Step: 1
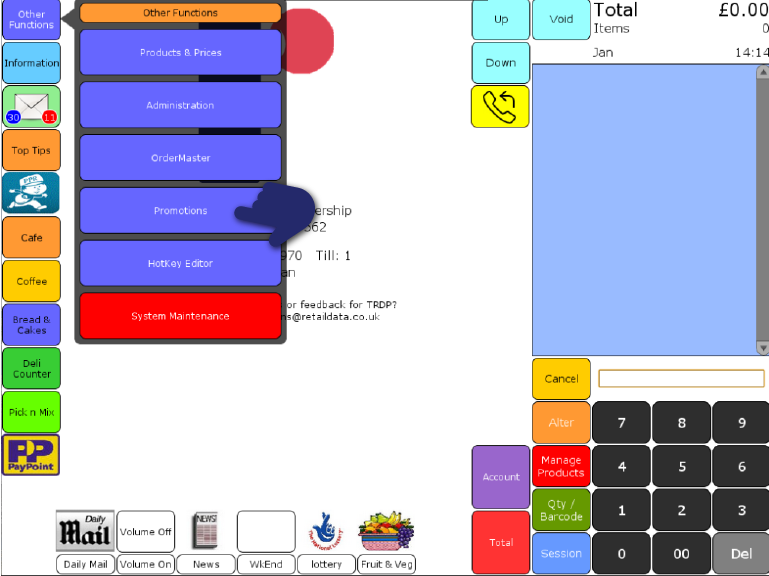
To enter promotions, press Other Functions and then Promotions.
Step: 2
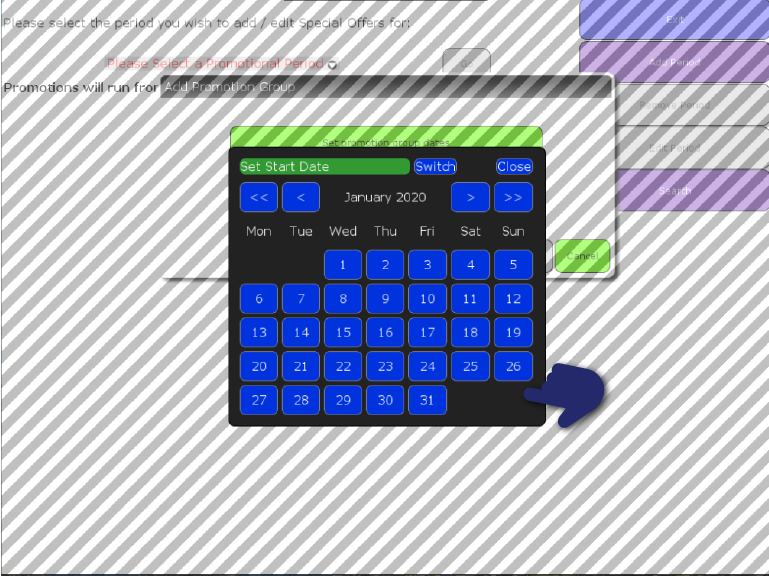
If you press Add Period you can create a promotion name and a group date.
Step: 3
To set a date, press Set promotion group dates, the screen will display a calendar for you to select a start date and an end date. Press Save to save your new promotions period.
Step: 4
To create a name, select on the text box next to ‘Promotion Group Name’, enter a name using the on-screen keyboard then press Submit.
Step: 5
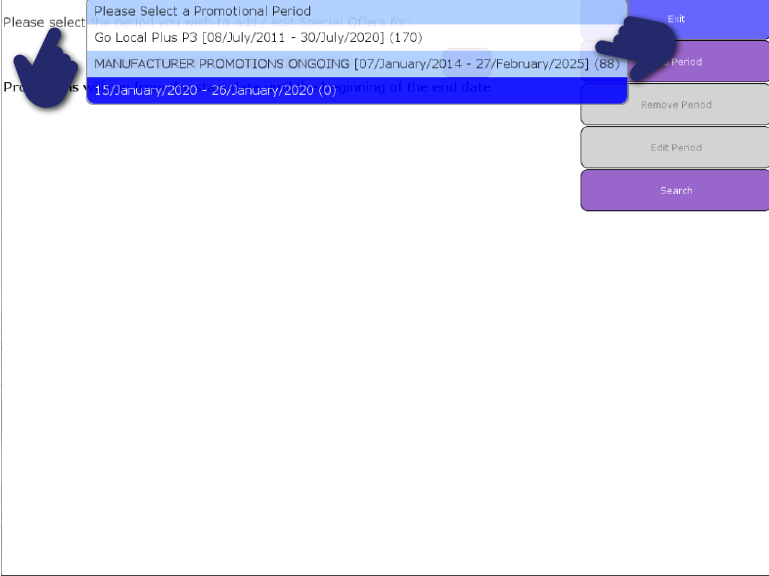
Then select the promotion period that you want to use by dropping down the promotions date box (touch down arrow) and selecting the required dates/promotional period name, press Go
Step: 6
The Promotions Editor screen displays. To add a promotion, press Add Promotion.
Step: 7
The Add Promotion screen displays. The top of the screen shows the type of promotion that will be added. To see the choice of promotion types, press on the drop-down list.
Step: 8
When a promotion has been triggered, the details of the promotion are shown on the light blue ‘Till Roll’ section of the screen and a pop-up window will display with the product promotion name.
Need more help?
Contact our Technical Support team.
365-day support as standard
95% of issues resolved on the phone
Speak to ShopMate experts every time
UK-Based Customer & Technical Support