ShopMate EPoS
Generating a report
Step: 3

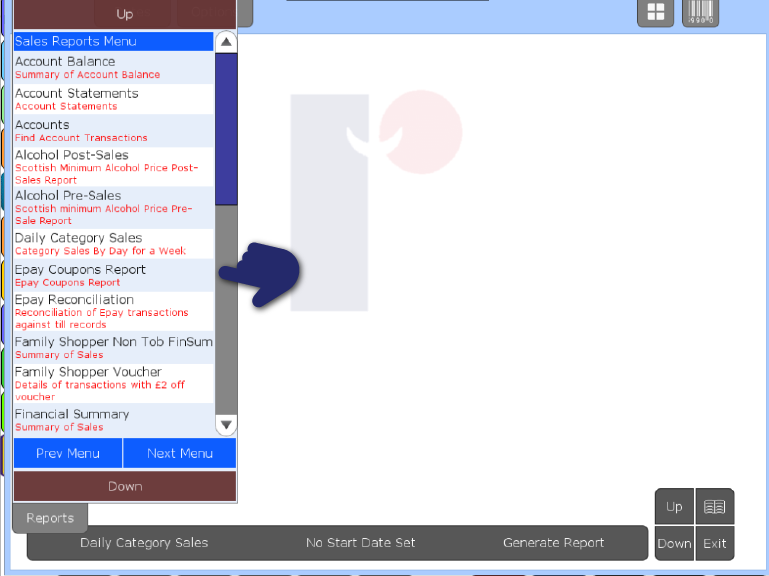
To select the report type, press the Reports tab at the top left. This will drop down a list of the available reports, with a brief description of what the report offers. To select a report, press on it. This will close the menu, and you will see the report name appear and flash in the Report Bar at the bottom of the screen. To close the list without selecting a report, either tap again on the Reports tab, or anywhere else on the screen.
Step: 4

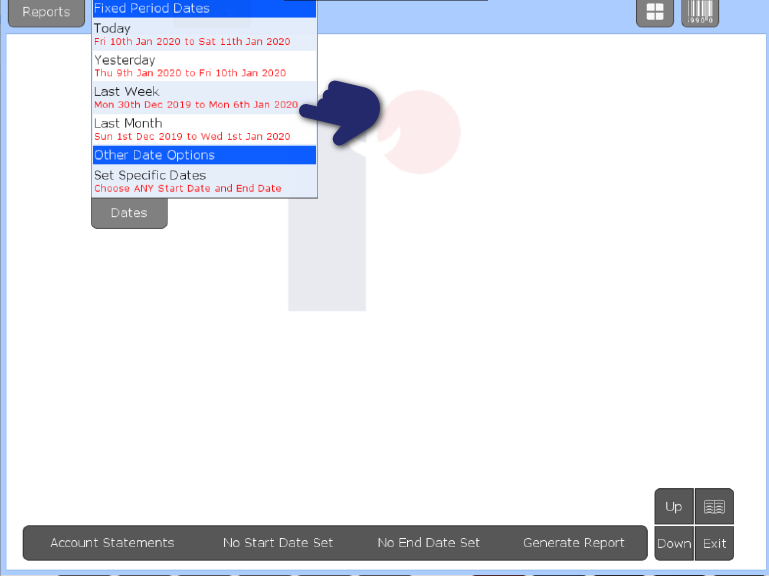
Once a report type has been chosen, select the dates that the report will cover from the dates menu press the Fixed Period Dates tab for a list of options, select one: Today, Yesterday, Last Week and Last Month. By selecting any of these, you will see the start date and end date of the report in the Report Bar at the bottom of the screen. When the Generate Report button goes green means the report is ready to be complied.
Step: 5

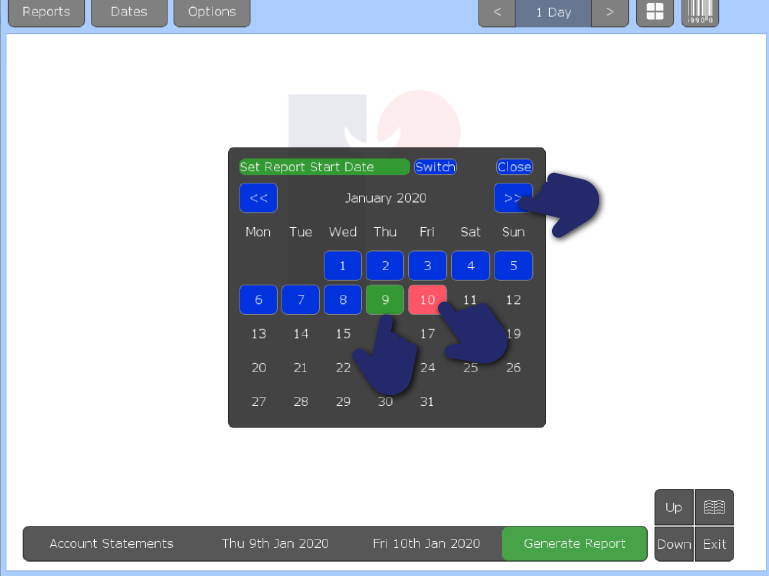
To select certain dates, use the Calendar controls to navigate through time – the << and >> buttons will go to the previous and next months. The first date you will select will be the ‘Set Report Start Date’ and will appear in green and ‘Set Report End Date’ will show in red. Once you select the end date, the date will appear on the report bar, and the calendar will close.
Need more help?
Contact our Technical Support team.
Contact our Technical Support team.
 |
365-day support as standard |
 |
95% of issues resolved on the phone |
 |
Speak to ShopMate experts every time |
 |
UK-Based Customer & Technical Support |
 01780 480 562


